When you have pain or an injury to your hips, it is EXTREMELY important you “jump ship” and start 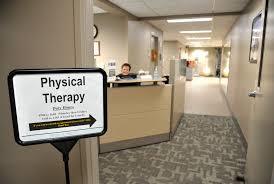
It’s only a matter of time…
If you can get healed within a short time window, all the kudos for you, but if you can’t, I can assure you, you’re in great hands.
Many people, (having included myself at one point) don’t understand how to properly stretch their own hip, let alone BOTH!. Twist and bend one way, and your muscles could be headed for a long drive.
If you’ve seen my past article, you’ll remember that there are good and bad exercises…
Certain moves can diminish your pain, while others can quite simply, worsen your pain.
But with all the starts bad, never spills for a bad ending.
I’m here to show you the right physical therapy hip strengthening exercises, and along the way I’ll hand over to you what I do every other day at home, so you can follow along and become hip pain FREE.
Going To Physical Therapy Will Help You
Hey, this journey might sound familiar: You’re finding it nearly impossible to move your hips, god what could be next? You jump out of bed in the worst form IMAGINABLE, making your move into the car, sitting in your car on your way to work is irritating, and now you have the next 20 hours or so ahead of you.
If you haven’t thought about physical therapy at this point, it’s time you not only do, but set up an appointment.
One session can change your “mind”, and “matter“.
How I benefited:
When I had my first meeting with my physical therapist, out in Bakersfield, CA, I was nervous, and not because of what I didn’t expect, but on how I would be moving my joints, and muscles around. I asked myself questions such as:
- Will it hurt?
- Can I actually get better?
- Will I Improve soon?
Come to finish my one week session, I had my answers.
I didn’t hurt, I got better on the 7th day of my week, and my muscles and joints felt about 60% better(after one week!). I found a better alignment in my pelvic bone, and sacroiliac joint. I’ll guide you to make sure you can do the same. from beginners to experts I got your back.
In this article, I’m going to show you the physical hip strengthening exercises you should be targeting.
Without further a do here they are…
The Best And “Go To” Hip Exercises
Do you feel like you can’t stretch? Or that you’re not in your youthful years?
Scratch, and erase that, because you can perform what I’m about to literally set in front of you.
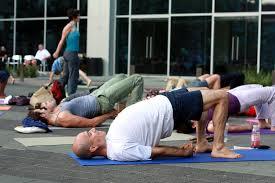
- The Basic Bridge
How to do:
- Lie on your back
- Bend your knees and keep your feet width apart and flat on the floor
- Tighten your stomach, gently.
- Tighten your glutes(butt)
- Inhale
- Now, Lift your hips 3-5 inches from the floor without arcing your back
- Hold it for 15 seconds
- Feel as stretch
- Exhale, and slowly lower your hips to the floor, one vertebra at a time.
What about a greater resistance workout?
2. A Bridge With A Resistance Band
Using a resistance band can optimize your stretch. When you add a band, it’ll jeep your body in proper alignment. With chronic lower back pain, you should begin with more slower movements, and build into them.
Tools:
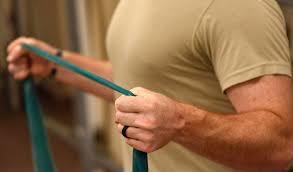
- Resistance band. Size small works the best
I use gold gym’s resistance bands. Here’s mine:
How to do:
- First, wrap a resistance band above your knees
- Lie down on your back
- Push your knees apart, keeping them in line with your hips
- Inhale
- Now, raise up, keeping everything aligned
- Hold it for 15 seconds
- Feel the stretch
- Exhale, Come down slowly, one vertebra at a TIME
- Done
If you’d like to learn about how to stretch with resistance bands, see this article here for more.
How about stretching with a naturally “inertia” moving object?
3. Bridge With Legs On A Ball
A ball can keep your lower body in a supported, and elevated level. Most workouts with a ball, I’ve noticed my core getting worked out the most. It’s great because, when I need a force pushing me back and pulling me forward. You get stability with momentum of movement.
Tools:
- An exercise ball
How to do:
- Lie on your back with your legs on top of the ball
- Tighten your stomach and your glutes(butt)
- Press your legs onto the ball
- Hold it for 15 seconds
- Slowly, move back to where you can get your legs off the ball
- Done
What about your obliques?
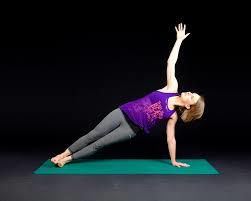
4. Side Planks
Side planks will strengthen your outer hips.
How to do:
- Lie on your right side
- Place your right hand on the ground
- Press up on your hand till your elbow is straight
- Your palm should be directly under your shoulder
- Keep your legs stacked on top of one another
- Your neck, back and legs should be in a straight line
- Hold it for 25 seconds
- Come back down
- Switch side and repeat 3 times
Okay, don’t be intimidated by the name on this next one. I mentioned it in my hip stretches article, and I stand by it as my favorite, because I can literally do it in the mornings, for workouts, and before bed.
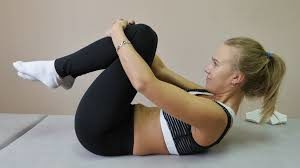
5. Apanasana Adaptation
If you took a look at my “best hip strengthening stretches article”, I listed this exact stretch there.
How to do:
- Sit in a comfortable seated posture
- Deepen your inhale, lengthen your exhale
- As you inhale keep your chest and back horizontally
- Exhale slowly
- Bring your belly toward your spine
- Lie on your back, legs extended flat on the floor
- Hands to your side
- Palms to the ground
- Bend your right knee, putting both hands on the right knee
- Straighten your arms
- As you exhale bend your elbows and bring your knee to your belly
- Inhale, straighten your arms coming back down
- Exhale, bringing your knee back to your belly once again
- Repeat again.
- Inhale bringing your knee back down, and raise and bend your left knee, bringing to your belly
- Exhale, and place your left hand on your left knee
- Inhale slowly, and exhale in this position
- Repeat for the left knee
- Done
Little did I know this one stretch changed my lifestyle and benefited me for years to come.
I took a lot away from seeing my physical therapist, I learned as much as I could, and added all the hip exercises into my routine. But the thought of doing them at home was not too far from my mind.
It was about a month after continuous physical therapy that I made a transition to exercising more at home.
I needed to save my money, and be independent. So what was my next step?
I asked around, and I came across a DVD recommended to me by my friend. Vinyoga’s therapy for low back, sacrum, and hips made it easy on me. I knew I was in good hands when I read a top physical therapist by the name of Gary Kraftsow would be running the structured lessons. He taught me the “Apansana Adaptation stretch I just showed you how to do.
==>LEARN more about Vinyoga Therapy here<==
How Gary Kraftsow’s Physical Therapy Can Help You
Have a look at who I speak highly about. The man Gary himself.
When you’re in hip pain and have nowhere to turn to, it can turn a small thought into an everlasting one. I know because I’ve been there.
Viny, created a step by step hip therapy strengthening routine that will help get the most out of your movements, and mobility.
He focuses on techniques through:
- Breathing
- Relaxing
- Meditation
- Strengthening
- Flexibility
- Movement
- Mobility
His exercises are tailored to your level of pain, so no matter where you are, he’ll get the best out of your condition.
Great, you have the information, but how can you get the most out of it?
What You Need To Shoot For
There are many hip strengthening exercises, some good, and others not so well.
So what can you do is the question?
Everyone is in a different stage. I can’t tell you where to start until you get checked from your physical therapist. I went to visit my PT when I had a terrible hip, it literally would not move! I hated it, was frustrated, and was mad at myself for causing it.
The stretches I listed above were all taught to me. added them day in and day out, and saw a significant increase at the end of my week. A month later, I felt way better. But then, the pain came back.
I had all the material, all the help that I paid for. This time, I opted out from continuing. I knew I couldn’t lose my discipline now. This was just the beginning.
To keep me in line, I borrowed my friends Vinyoga therapy DVD, and kept it for 2 months. He insisted to not return it to him, but I did. I wanted to buy my own copy, and so I did just that.
The Future of Physical Therapy Is Bright
I remember my first hip pain. I iced those sacroiliac joint dysfunctions. That was a short term solution.
Then came the long term plan.
What do you do when you have continuous hip pain? You visit the physical therapist, or if you’re like me, you’ll work to be independent.
When you have pain in your hips, its extremely important to strengthen those joints and muscles as soon as you can. One session is all it takes to make you feel better. One move changes your physical state.
Getting a sense for the types of stretches you need to do is important in your healing process. With all the stretches I listed above, they will help you for the long haul.
Learning to strengthen your hips at home can be more effective than going to see your physical therapist, and continuously spending money.
If you have any concerns, opinions, or questions, please leave me a message down below. Thank you.
“The best six doctors anywhere and no one can deny it are sunshine, water, rest, air, exercise, and diet.”
~Wayne Fields
The next installment of my Remove Back Pain System opens up 2 routes for both acute and chronic lower back pain. I would like to show you one road, but the road to success comes in increments, not all at once. Some of us will need to work on a certain aspect of building a greater lower back through managing weight and continuous exercise, while some of us need to focus on better posture. You’ll circle around and eventually get back to one another page.
Better posture leads to better exercise first, and then exercise will lead to better posture comes second.
The Remove Back Pain System
In the next segment, its important that you continue to stretch and have as much exposure as you can, so when you get the chance, head on over to the best stretches for your lower back pain article here.

